baked pumpkin soup and savory pumpkin pie

baked pumpkin soup inside the pumpkin

this past weekend, i took this cutey white pumpkin i bought and used it to recreate this soup: pumpkin soup in a pumpkin, from saveur.

i first heard of this concept in fresh air’s interview with ruth reichl, who recounted it as one of her favorites with such detail that i became obsessed with figuring it out. after scooping out the innards, i roasted up the seeds with salt & curry spices while reading up on how execute the recipe.

pumpkin soup

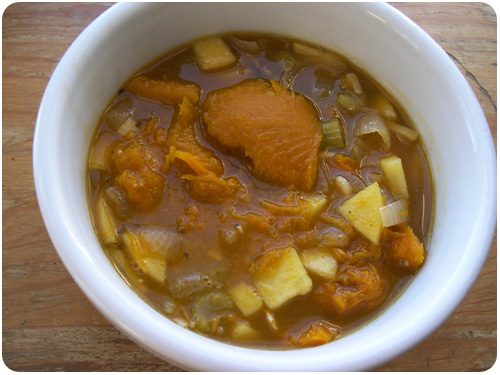
i made a vegetarian version [using vegetable stock], substituted parmesan for swiss cheese, and skipped the bread crumbs and heavy cream. i also chopped up an apple from our apple picking adventure because it’s fall and i thought it would be fun. turns out i am right about both fall & fun!

the pumpkin i used wasn’t as big as called for, and still, it fed us 2 hearty meals [4 bowls]. you’re probably thinking once you’re done, you just throw it on the compost heap—but there’s still a lot more mileage you can get out of this empty, cooked squash once the soup has been eaten.

i am really into mixing things up, turning sweet things savory & vice-versa. for the last few years, i’ve been experimenting with savory pumpkin pies, and though this seems like an obvious fall dish to me, when i tell people about it, i often get a reaction that suggests it’s a crazy idea. in my opinion, it’s a crazy GOOD idea.

normally, to make any type of pumpkin pie, you would start by cooking a pumpkin. since you already have a savory-seasoned, cooked pumpkin shell, all you have to do is cut it in quarters [or in pieces comfortable to handle] and scrape the remaining flesh into a bowl, similar to how you might eat a cantaloupe with a spoon.

i collected about 3 cups of cooked pumpkin from mine. once you know about how much you have, here’s one way to deal with it:

ingredients:
1 sheet puff pastry
2 medium onions, chopped
4 cloves garlic, minced
2 tbs olive oil
2 tbs white wine vinegar
3 large ribs celery, sliced crosswise
10 medium shiitake mushrooms, chopped
2 eggs
1/2 cup grated parmesan cheese + more for the top

spices [interpret to your favorite style]:
1 tb cumin
1 tsp chili powder
1 tsp coriander
1/4 tsp cayenne pepper
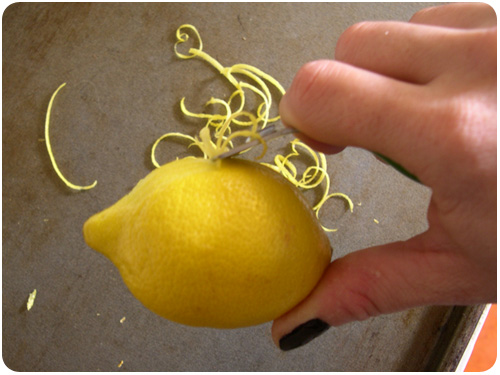
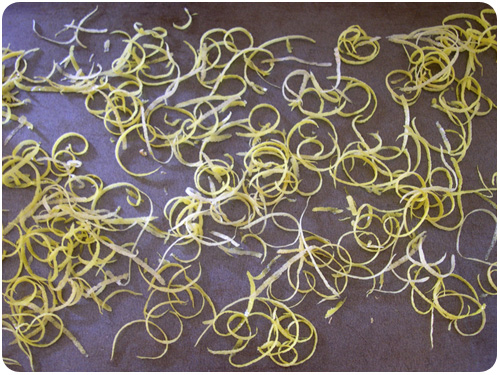
1 tsp salt [i used homemade lemon salt]
1 tsp black pepper

1. set out your sheet of puff pastry to defrost, and preheat the oven to 350.

2. in a medium frying pan, saute chopped onion in olive oil and white wine vinegar over medium heat until translucent, about 5 minutes. add minced garlic and saute 2 more minutes. add chopped celery and a splash of water, turn down heat to low and cover.

3. add to your bowl of cooked pumpkin 2 eggs, the parmesan cheese, and spice mix. mix well.

4. after 5 minutes, return to your frying pan add the mushrooms and toss to coat. cook uncovered until liquid either cooks away or is absorbed. remove from heat and add to the pumpkin mixture and mix well.

5. place your puff pastry in a 9″ baking dish, allowing it to line the bottom and sides of the dish. cut to fit, or wrap irregular edges—your choice. spoon in the pumpkin mixture, spread evenly and sprinkle grated parmesan and black pepper over the top. bake 1 hour at 350.

savory pumpkin pie

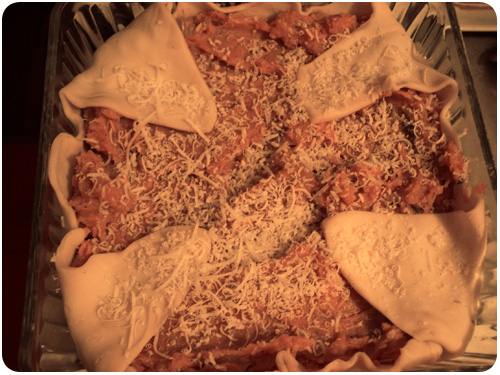
here’s what mine looked like going into the oven. is it a work of art? no! is it going to be delicious? yes! is this a recipe you can modify? absolutely! only a few of the ingredients are interdependent, such as the addition of eggs to the pumpkin mix, the ratio of added vegetables, and the use of a crust. you can switch out the cheese and modify the spices however you like. you can substitute the celery or mushrooms if they’re not your thing [though i’d consider substituting other vegetables in, like peppers, carrots, chard, more onion or add breadcrumbs to keep the pumpkin from being to heavy or solid]. the point is, this is an interpretive dish where you let the pumpkin be the substrate for any flavors you like, and you enjoy the fact that you had so many meals out of one single squash. enjoy!

freezing summer fruit

jars with lemon zest ready for filling

one of the tricks of eating seasonally is preserving fresh fruit and vegetables for eating off-season. i try to do this with minimal invasion to the raw, freshness, which means i try to avoid overcooking or processing. i tend not to make jams or jellies, because i tend to stay away from anything that calls for more sugar than the main ingredient. freezing summer fruits, especially stone fruit, has been a great way to have a peach galette in winter or a nectarine topping for oatmeal. or in this case, plums, so visions of sugarplums can dance in your heads by the holidays.

i like to put my fruit up by layering chopped pieces with lemon zest, squeezing a half a lemon’s juice into the jar, and filling the remaining space with water. i use lemon partially as a preservative and partially as a flavor enhancer, which it does really well with all kinds of fruit. i’m using 8-oz jars, so you can figure 1 lemon for each pair of jars. to get started, use your zester to zest the lemons you’ll be using, and drop a pinch of zest into the bottom of each.

how to slice stone fruit

the best way to prepare stone fruit is to cut around the pit along the natural seam of the fruit in a complete circle. then twist the two halves in opposite directions to loosen the flesh from the pit. you can either pull the pit out, or cut it out. at this point, you’ve sliced the fruit lengthwise, so you can section it off to the size of your choosing and then cut crosswise. i prefer to slice lengthwise into eighths, and then make crosswise cuts that allow the fruit to stack compactly.

slicing and chopping plums

you can chop them all up, or pack as you go. layer your chopped plums into the jars, and put another pinch of lemon zest on each layer until your jar is filled with about a half-inch of headspace. i like to tamp it down with a spoon as i go.

layering chopped plums and lemon zest for freezing

put your last pinch on the top, squeeze your lemon juice over the fruit, and fill the rest with water to just cover the fruit on top. i like to put my jars uncovered into the freezer just to make sure the expansion of freezing water doesn’t overfill or pressurize and crack the jars. once they’re frozen, tighten the caps to finger-tight and freeze until you’re ready to use!

roasting peppers

ripe red peppers

one of the many late summer abundances are capsicum peppers of all kinds. each year, i pick a selection for roasting and storing to use through the year. you can choose any color you like, but i prefer red and yellow myself.

get yourself down to your favorite farmer’s market and pick up a as many as you like. i usually do about 16, which ends up being 2 mason jars of peppers in storage. but if you like, do less or more, mix & match colors, do what makes you happy.

you need very little equipment to roast peppers, though i will say it might be tough if you don’t have a roasting tray in your oven. you’ll also need mason jars or canning jars to accommodate the quantity you’ll end up with. i think 8 peppers to a quart jar is a good rule. you can sanitize these by boiling them in a water bath for 10 minutes if you like, or just wash them really well. i like to use a set of tongs to grab and rotate hot peppers as they roast. other than that, maybe a good knife for cutting them down to size. as far as ingredients, i always add white wine vinegar for storage, but if you want to add lemon juice or some other spices, it’s up to you.

peppers in the roasting oven

once your peppers are clean, place them along the sides of your roasting tray so each of them has a good angle on the gas flame. you don’t want to put any directly under unless you have the space for it, since they’ll be so close to the flame. [excuse my antique oven, showing its age]

i start with my peppers upside-down and rotate them 4 times to get each side. then i flip them stem-up and rotate 4 more times for a fully-roasted pepper.

the goal here is to roast each side until it’s a bit charred and the skin separates from the flesh of the pepper. once you put them in the oven, you’ll want to check periodically to see how they progress. this isn’t something you can really time, since each pepper varies in thickness, but if you check every 5-10 minutes, peppers are very forgiving, you’ll catch each one as it’s ready.

roasted unpeeled peppers

as your peppers finish roasting, put them in a bowl to catch any juice that might be leaking from them. i usually put a plate over the bowl to allow heat to finish the process of loosening the skins. there are all kinds of suggestions on doing this, i like the plate over bowl idea because everything is washable.

my process at this point is to slash the pepper with a knife over the bowl and drain the juice without getting seeds everywhere. then i move over to a plate and peel the skin off the pepper. i’m not too picky about getting all of it, sometimes skin is stubborn and i’d rather not fuss over it. once the pepper is peeled, cut the stem out, open the pepper and scrape the seeds out onto the plate. set your finished pepper aside on a separate plate for storage.

once you’ve peeled & scraped all your peppers, return to the first bowl with the reserved juice and strain it to separate whatever debris ended up in the bowl to a cup and set aside for storage.

at this point, all that’s left to do is prepare for storage. get your mason jars and pour equal amounts of the reserved pepper juice in each. there’s no rule of thumb here, it’s just for extra flavor. cut your peppers into quarters lengthwise and place in the jar, using a spoon to press them down and help clear trapped bubbles. once the jar is full to about an inch of headspace, pour in vinegar or lemon juice to fill just below the neck of the jar. you can supplement with water if you’d like less vinegar. i find that vinegar acts as a preservative that allows me to store peppers in the fridge for a year, which is why i always add it to mine. note: if you’re layering in salt or spices, it’s a good idea to sprinkle them in after each whole pepper [every 4 sections] or so goes in, to distribute the flavor evenly.

roasted peppers in a mason jar

once you have your finished product, rotate the jar to try to get air bubbles to the top, and then set it in the fridge. now you can add all kinds of summer pepper goodness to your fall, winter & spring dishes without straying from a seasonal eating plan.

drying lemon zest for the spice cabinet

fresh lemon with my zyliss lemon zester

i’m a big fan of citrus and i use lemon zest to season and flavor so many foods, at this point it’s a main staple in my kitchen. i particularly like this zester from zyliss, since it’s super sharp and creates citrus zest in 2 sizes. lately i’ve been using lots of lemons, and usually i just reserve the zest in the fridge for use that week, but since i’d never go through this amount quickly, i thought i’d dry them out for use as a seasoning.

lemon zester in action

to zest a lemon, or other type of citrus, hold the zester firmly against the fruit and scrape down the side, pressurizing your grip with your thumb as i am above. despite my balancing act in the photo, this is usually done with 2 hands so you can get the most zest from the fruit. i do this right over a cookie sheet so i can put it directly in the oven. note: if you want to make lemon salt, sprinkle a thin layer of salt on the cookie sheet and angle your zester down at the salt, so the oil from the citrus peel sprays the salt as you do the rinding. then give the sheet a good shimmy side-to-side so the salt coats some of the lemon zest before you set it to dry.

lemon zest ready for drying

when you’re done rinding, you’ll have a nice quantity of zest for drying. i put mine in the oven, allowing the heat from the pilot to do its work, which it does rather quickly. you can also air dry for a couple hours. lemon zest doesn’t need much applied heat, so i wouldn’t recommend heating the oven to dry it, if you don’t have a pilot light, just set it on the stove.

dried lemon zest

once the zest is dry, collect it in a jar and store in the pantry. here’s my collection so far, i’m thinking of making my own lemon pepper for the mill. note: if you’re making lemon salt, you’ll want to collect the salt and zest in a jar. you may have to rub spots on the cookie sheet where the lemon oil-soaked salt sticks to free it up. you can crush the lemon zest if you like, or leave it whole. this flavored salt is best dispensed in a mill rather than a shaker, and freshly ground on the spot.

3-alarm smoked chili pepper salsa

smoking chilis on the grill

this weekend i decided to take the modest bounty of red jalapeño chilis and make salsa. i only had a handful, so i supplemented my harvest of jalapeño and poblano with more from the farmer’s market, adding some half-red anaheims. then i swung by my friend’s house to pick up some habañeros to throw in too. i smoked 11 of them so i could return 6 to him for another salsa project, but i used 5.

i read up on smoking peppers and found that it’s a simple process of adding hardwood chips to coals at about 200 degrees. i had to do mine by sight, but they got a good smoking for a few hours on the grill. i separated amar’s chilis and got to work slicing and seeding the roasted peppers. i reserved the seeds in the event that the salsa needed more heat, but once i got to cooking i found that 5 habañeros was more than enough for my tolerance.

blended salsa

many recipes for chipotle salsa call for tomato paste, but i was determined to make everything from scratch, so i used 2 jars of tomatoes i canned last summer, and simmered them with a chopped onion and minced garlic until they reduced sufficiently. i also chose to blend it to the above consistency, but you could certainly keep it chunky if that’s you’re preference.

finished salsa in a jar

i took a close-up of the jar to show the particulates. there’s a lot of roasty goodness in there. the finished product is the consistency of tomato sauce, but you could thin it down with cider vinegar for more of a pepper sauce, which i might try with some of it, because it’s so spicy! i composed this recipe myself, feel free to use it as a base for interpretation.

3-alarm smoked chili pepper salsa
ingredients:
10 medium red jalapeños
2 medium poblanos
2 medium red anaheims
5 medium habañeros
1 medium onion
2 cloves garlic, minced
2 cloves garlic, crushed
16 oz crushed tomatoes
2 tbs olive oil
4 tbs white balsamic, white wine, or cider vinegar
2 tbs balsamic vinegar
2 tbs sugar
1 tsp salt

equipment:
charcoal briquettes
hickory chips
charcoal BBQ grill
rubber gloves

light your charcoal briquettes in your BBQ. while they light and come to temperature, and soak hickory chips in a bowl of water about 20 minutes. when the briquettes are lit, spread them out, sprinkle some hickory chips over them and put your grill in place.

put your selection of chili peppers on the grill, turning as needed as they char on all sides. add hickory chips as needed and cover the grill so the smoke flavor can infuse into the chilis. they are ready when all sides are charred and they appear partly wilted and cooked through. [mine took a couple hours.]

while the chilis are smoking, add the olive oil to a saucepan and simmer the chopped onion on medium heat until translucent. add the minced garlic and simmer 5 minutes more. add the crush tomatoes and simmer uncovered until reduced and thickened [i did mine 30 minutes].

when the chilis are ready, take them to the kitchen and put on your rubber gloves [hot chili pepper oil is an irritant and should not come in contact with your skin in this quantity]. slice each pepper lengthwise, cut the stem off around the top and scrape the seeds with the blade of your knife into a bowl. you can reserve the seeds to add if you’d like to increase the heat later.

allow your tomato sauce to cool or work in small batches. puree the tomato mixture with the roasted peppers, balsamic vinegar, remaining wine/cider vinegar, crushed garlic, sugar and salt. taste and adjust seasoning to your preference.